Trust me, this is a really easy sewing project that, in other words, means that
you can actually make this velvet choker and wear it in about 10 minutes.
Dinner with the girls? You now have the perfect accessory and for less then...5 euros!
//
Credetemi, è davvero un fai da te facile che, in altre parole. significa che potete
realizzare ed indossare il collarino in meno di 10 minuti.
Cena con le ragazze? Ora avete l'accessorio perfetto e...per meno di 5 euro!
***
You need // Vi occorre:
- Velvet ribbon (measure your neck circumference and add 5 cm / 1,97 in). //
Nastro di velluto (misurate la circonferenza del vostro collo ed aggiungete 5 cm).
- 2 press studs (for each choker you want to make). // 2 bottoni automatici
(per ogni collarino che volete fare).
- Needle, thread and scissors. // Ago, filo e forbici.
How to // Come procedere:
1)
The cool thing about using velvet ribbon instead of fabric is that you won't have to
sew the hems except for the cut extremities. So, first, measure the ribbon around your neck
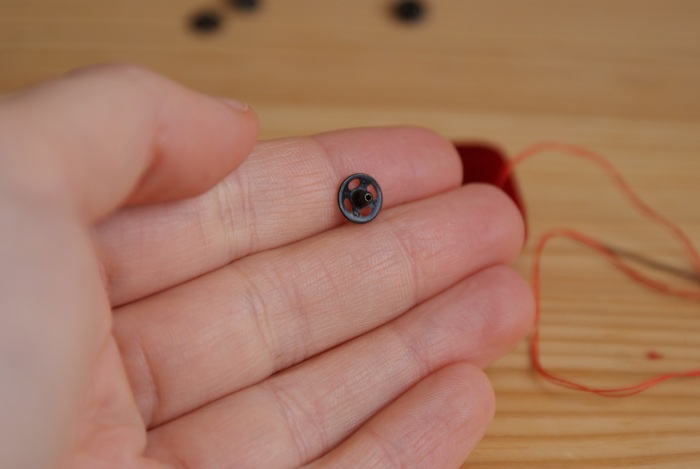
and sign where buttons will be (don't make it too strict!). Then open the studs
and take the 2 "male" parts (yeah, male... how would you call them? I really don't know!).
Fold one extremity and sew them on the velvet side: by doing this you will fix the
studs and make the hem at the same time, double winning! // La cosa bella dell'usare
il nastro di velluto invece che il tessuto vero e proprio è che non dovrete cucire gli orli,
ad eccezione delle estremità tagliate. Dunque, misurate il nastro intorno al collo e segnate
dove andranno i bottoni (non fatelo troppo stretto!). Poi aprite i bottoni e prendete le 2 parti
"maschili" (ehm...non saprei come altro definirle!), piegate una estremità e cucitele
sul lato vellutato: facendo così non solo fisserete i bottoni ma farete anche l'orlo!
2)
Now sew the 2 holed (female) parts on the other folded extremity, but on the internal
side of the choker. Be careful to sew the couples at the same height :) // Ora cucite le parti
col buco sull'altra estremità piegata, ma sul lato interno del collarino. State attente
a cucire le coppie alla stessa altezza :)
3)
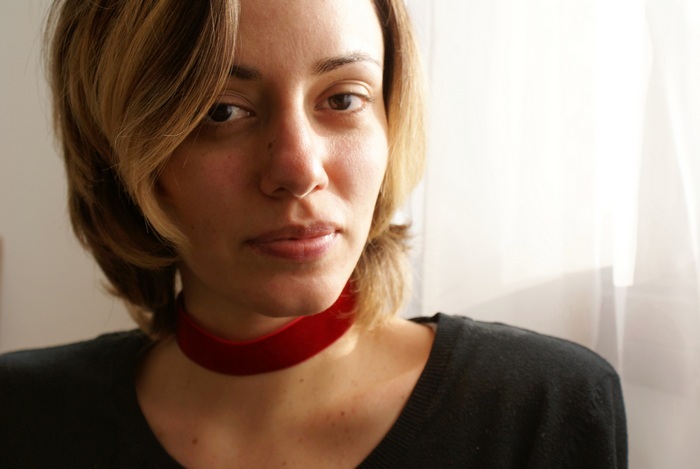
You're done! I didn't resist and made also in blue, totally love it! //
Fatto! Io non ho resistito e l'ho fatto anche blu, lo adoro!
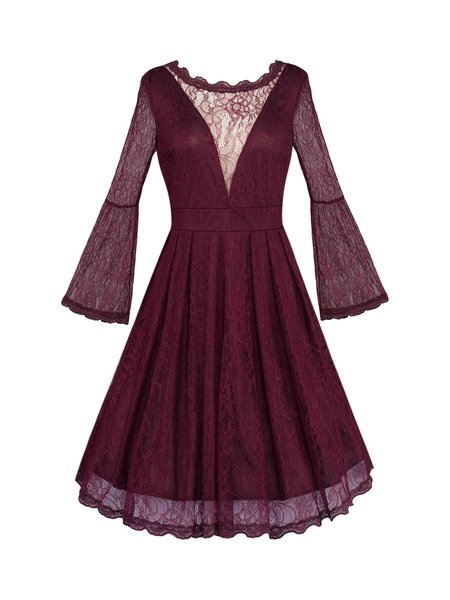
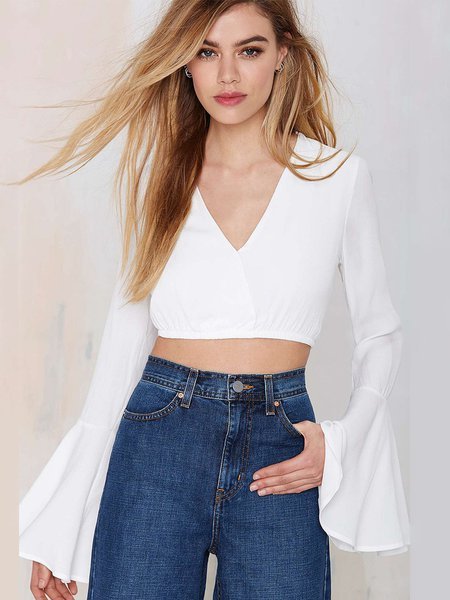
And, if you are looking for a nice dress/top that matches your new choker, I can suggest you
StyleWe (I've already told you about this site here and here). I just love their dresses!
I always find something I like and now I discovered also JustFashionNow (where
I found this amazing dress, for example or their beautiful crop tops).
//
E, se siete alla ricerca di un bell'abito o top da abbinare al vostro nuovo collarino,
vi suggerisco StyleWe (ve ne avevo già parlato qui e qui). Adoro questo sito! C'è sempre
qualcosa che mi piace e ora ho scoperto anche JustFashionNow (dove ho trovato
questo abito meraviglioso o i loro crop top).

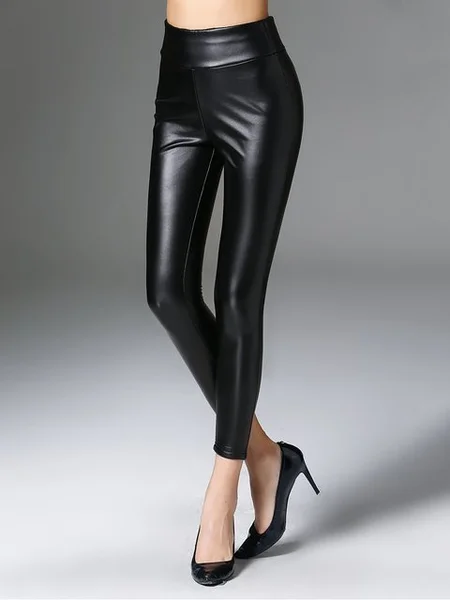
Look at the leather pants section in StyleWe if looking for something more "aggressive"
and, if you want, learn more here about StyleWe.
//
Guardate la sezione dedicata ai pantaloni in pelle, se cercate qualcosa di più "grintoso"
e, se vi va, scoprite di più su StyleWe qui.
xx
This post is in collaboration with Stylewe.com.
Questo post è in collaborazione con Stylewe.com,
ma non sono stata pagata o ricompensata in alcun modo per parlare bene dei prodotti.
L'articolo rispecchia in modo trasparente la mia opinione.
Questo post è in collaborazione con Stylewe.com,
ma non sono stata pagata o ricompensata in alcun modo per parlare bene dei prodotti.
L'articolo rispecchia in modo trasparente la mia opinione.




It looks good on you!
ReplyDeleteGreat job dear!
Emma
www.emmalovesfashion.com
Thank you, Emma! xx
Deletewow...thats a great idea...would love to try it...thanks for sharing..
ReplyDeletewww.crazyaboutcolors.com
Love this DIY project!
ReplyDeleteCaitlin, Beauty & Colour
Thank you Caitlin!
DeleteVery simple and beautiful! I love chokers!
ReplyDeletewww.recklessdiary.ru
I love them too! :D Thanks!
DeleteI love chokers, they are so cute and pretty, thanks for sharing your DIY chokers. ^^ No need for me to but always.
ReplyDeletehttp://itsbeyondimaginations.blogspot.com/
Thank you so much, Ann!
DeleteLove this chocker! It is so simple yet classy. I really enjoy your DIY posts :)
ReplyDeletefindyourownhope.blogspot.com
So glad you enjoyed!
DeleteNice DIY!
ReplyDeletehttp://www.myclusterofthoughts.com/
Thanks!
DeleteThis is such a good and simple idea I might have to try it out!! :D
ReplyDeletexx Sofia | SOFIAADOT
Yes! Really SO simple! :)
DeleteI love the simplicity behind your DIY's and the fact that they always look perfect :) I must try this one. You always inspire me to become more creative :)
ReplyDeleteEnjoy the weekend! <3
fashionabejita.blogspot.com
Thank you, my dear Tijana! I am always so glad to read your words :)
Deletetotally love the DIY idea!
ReplyDeletexoxo
style frontier
Thanks a lot!
DeleteThis looks so lovely on you, definitely going to give it a go!x
ReplyDeleteSHAKIRA / SHAKIRA SACKS
Thank you, Shakira!
DeleteGreat DIY! I have been making my own chokers for about a year now and it's SO much fun finding ways of embellishing them to match outfits :) Have a lovely weekend!
ReplyDeleteGabrielle | A Glass Of Ice x
Yeah, they're totally a must! Perfect with every outfit and so easy to make!
DeleteI love it, it's so easy! If I find velvet ribbon I will for sure try this.
ReplyDeleteSamantha Series
Feel free to let me know if you make it! :)
DeleteChokers look so fabulous on you. I wish I could rock them half as great as you do. I'd definitely embrace them more
ReplyDeleteSxx
www.daringcoco.com
You can, honey! You'd look fab with them :)
DeleteThat's amazing!
ReplyDeleteHave a nice week-end!
Gil Zetbase
Looks great and really easy! Thanks for the DIY!
ReplyDeleteGemma x
www.jacquardflower.uk
This is a great idea, looks so professional with the buttons!
ReplyDeleteDanielle's Beauty Blog
Yes, this chocker is really easy to make! And much quicker than in 40 minutes :) You look adorable and so beautiful <3 Thanks a lot for sharing!
ReplyDeletexx from Bavaria/Germany, Rena
www.dressedwithsoul.com
It looks very pretty and easy to make!
ReplyDeletexo
www.carinavardie.com
You are so pretty! And nice idea! Lovely photos ❀
ReplyDeleteDo you wanna follow each other via GFC or Bloglovin? Lemme know ♥
* Blog de la Licorne *
Wow great!! Thank youu for the Review!!
ReplyDeleteI love Chokers
http://www.swisstwins.ch/