")
Hoop earrings are one of those things that seem will never disappear, maybe because give
that JLo look so perfect with a high pony tail.
Anyway, I have my pair since... ahem... I don't remember, but the important thing is that
I am here to show you an INCREDIBLY EASY way to give them a different style depending
on the moment. You just need to follow this diy and make your pendants,
you will be able to add or remove them and transform your hoops everytime you'll want!
//
Pare che gli orecchini a cerchio non scompariranno mai, forse perché danno quel tocco
alla JLo che tanto sta bene con una coda alta.
In ogni caso, io ho i miei da... ehm, non lo ricordo, ma la cosa importante è che sono qui
per mostrarvi un modo INCREDIBILMENTE FACILE di dargli uno stile diverso
in base all'occasione. Vi basterà seguire questo tutorial e creare i vostri pendenti,
potrete metterli o toglierli e trasformare i vostri cerchi ogni volta che vorrete!
***
You need // Vi occorre:
- Hoop earrings. // Orecchini a cerchio.
- Pliers. // Pinze.
- Scissors. // Forbici.
- Beads. // Perline.
- Tacks for jewelry. // Chiodini per bijoux.

How to // Come procedere:
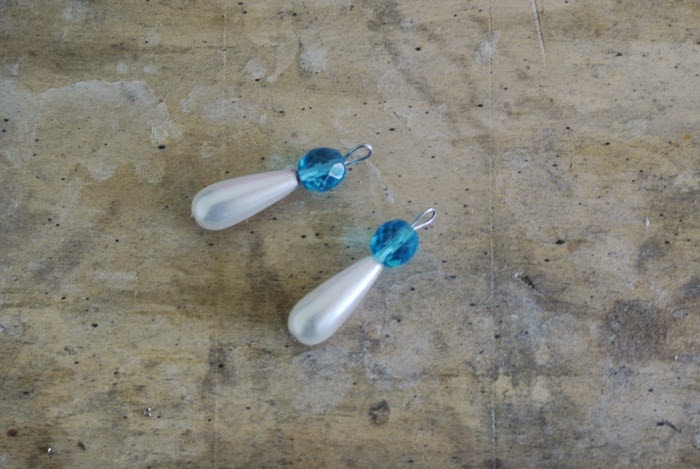
1)
Take the beads and one tack (I have flat-headed ones). // Prendete le perline ed il chiodino
(io li ho con la testa piatta).


2)
Insert the beads in the tack, leaving about 6 mm (0,2 in) from the top. // Infilate le perline
nel chiodino, lasciando circa 6 mm dalla punta.

3)
Fold the top of the tack using the pliers to create a ring. // Piegate il chiodino con le pinze in modo da creare un anellino.


4)
Repeat with the other tack and beads. // Ripetete con l'altro chiodino e le altre perline.
5)
Insert the pendants into your hoops. // Infilate i pendenti nei vostri cerchi.

6)
Done! Fatto!
")
")
")
Enjoy your hoops! // Godetevi i vostri cerchi!
xx
I love this - it's so creative! :)
ReplyDeleteThank you so much Monica! And thank you for visiting :)
DeleteAwesome idea, need to try it out! Great post!
ReplyDeleteTanya
www.stripesnvibes.com
BlogLovin
Thank you, Tanya! You should try it, it is sooo easy to make :)
DeleteSoo fashionable <3 !!
ReplyDeletehttp://kasjaa.blogspot.com/
Thank you, Kaasja! xx
DeleteTroppo carino questo DIY! Che ideona *_*
ReplyDeleteproverò a farlo anch'io!!!
un bacio
Francesca http://www.everydaycoffee.it/
Grazie mille, sei gentilissima! Spero di rivederti presto qui :) xx
DeleteVery pretty! Love the blue. You are very talented xx
ReplyDeletehttp://brit-bakes.blogspot.co.nz/
Thank you Brittany, you are sooo kind :)
DeleteWow, so pretty! Thank your for showing how to look fashion forward without spending loads of money.
ReplyDeleteI can't get over how easy to make but beautiful these earrings are <3 Kisses from Hungary xo
Csenge | Csenge's Point
Thank you dear! Yes, it is so easy and almost no-cost! Thank you Always for your lovely comments! xx
Deletelove it :)
ReplyDeletekisses from dubai ♥
www.mahryska.com
Thank you dear Mariyah!
DeleteThank you so much :)
ReplyDeleteAdore it!!
ReplyDeleteXo
Valentina
http://fashionneed09.blogspot.it/
Thank you, Valentina! xx
DeleteIt looks so simple but so cute! I love it <3
ReplyDeletexx Bash | Bash Says Hey | bloglovin'
Thank you! Yes, it is super simple (this is why I like so much!). xx
DeleteElisa, bravo! Such a simple DIY gave such impressive results! Thanks for sharing!
ReplyDeleteAnd you are sooo pretty :)
http://dushonok.com/
Thank you, Nadya! You are so kind, I am so glad you liked this post :) xx
DeleteI love earings, it looks soo cool :D Would you like to follow each other? Just let me know and I will be back here!
ReplyDelete